- Prerequisites
- Installation Steps
- Authentication
- Detaching, stop and start commands
- Upgrade SENTIENT ANALYTICS Service
- Troubleshooting
- Next steps
This guide will help you to install and start SENTIENT ANALYTICS using Docker on Windows.
Prerequisites
-
Have Docker Desktop for Windows. You can find out how to install it here
- SENTIENT version 4.3.0 or newer. In case you have SENTIENT version 4.2.1 or older, you could connect SENTIENT ANALYTICS to SENTIENT following the next guide.
- Active SENTIENT ANALYTICS addon. To find out how to activate it, please follow the next guide.
Installation Steps
Step 1. Docker Compose setup
SENTIENT ANALYTICS can be run either in the same Docker Compose file as SENTIENT or in a separate Docker Compose file.
For small and medium installations, we recommend installing SENTIENT ANALYTICS in the same Docker Compose file as SENTIENT.
Open the Docker Compose file with SENTIENT services: Make sure that:
If any of them are missing, update your Docker Compose file according to the SENTIENT Docker installation instructions. Your Docker Compose file should be similar to the one shown in the instructions. |
Create a docker compose file for SENTIENT ANALYTICS service: Add the following configuration to the YAML file. Where:
|
Step 2. Start SENTIENT ANALYTICS service
Set the terminal in the directory which contains the docker-compose.yml file and execute the following commands to up this docker compose directly:
1
docker compose --profile sentient-analytics up -d && docker compose logs -f sentient-analytics
After executing this command you can open http://{your-host-ip}:8888 in your browser (for ex. http://localhost:8888).
You should see SENTIENT ANALYTICS login page.
Step 3. Sync SENTIENT With SENTIENT ANALYTICS
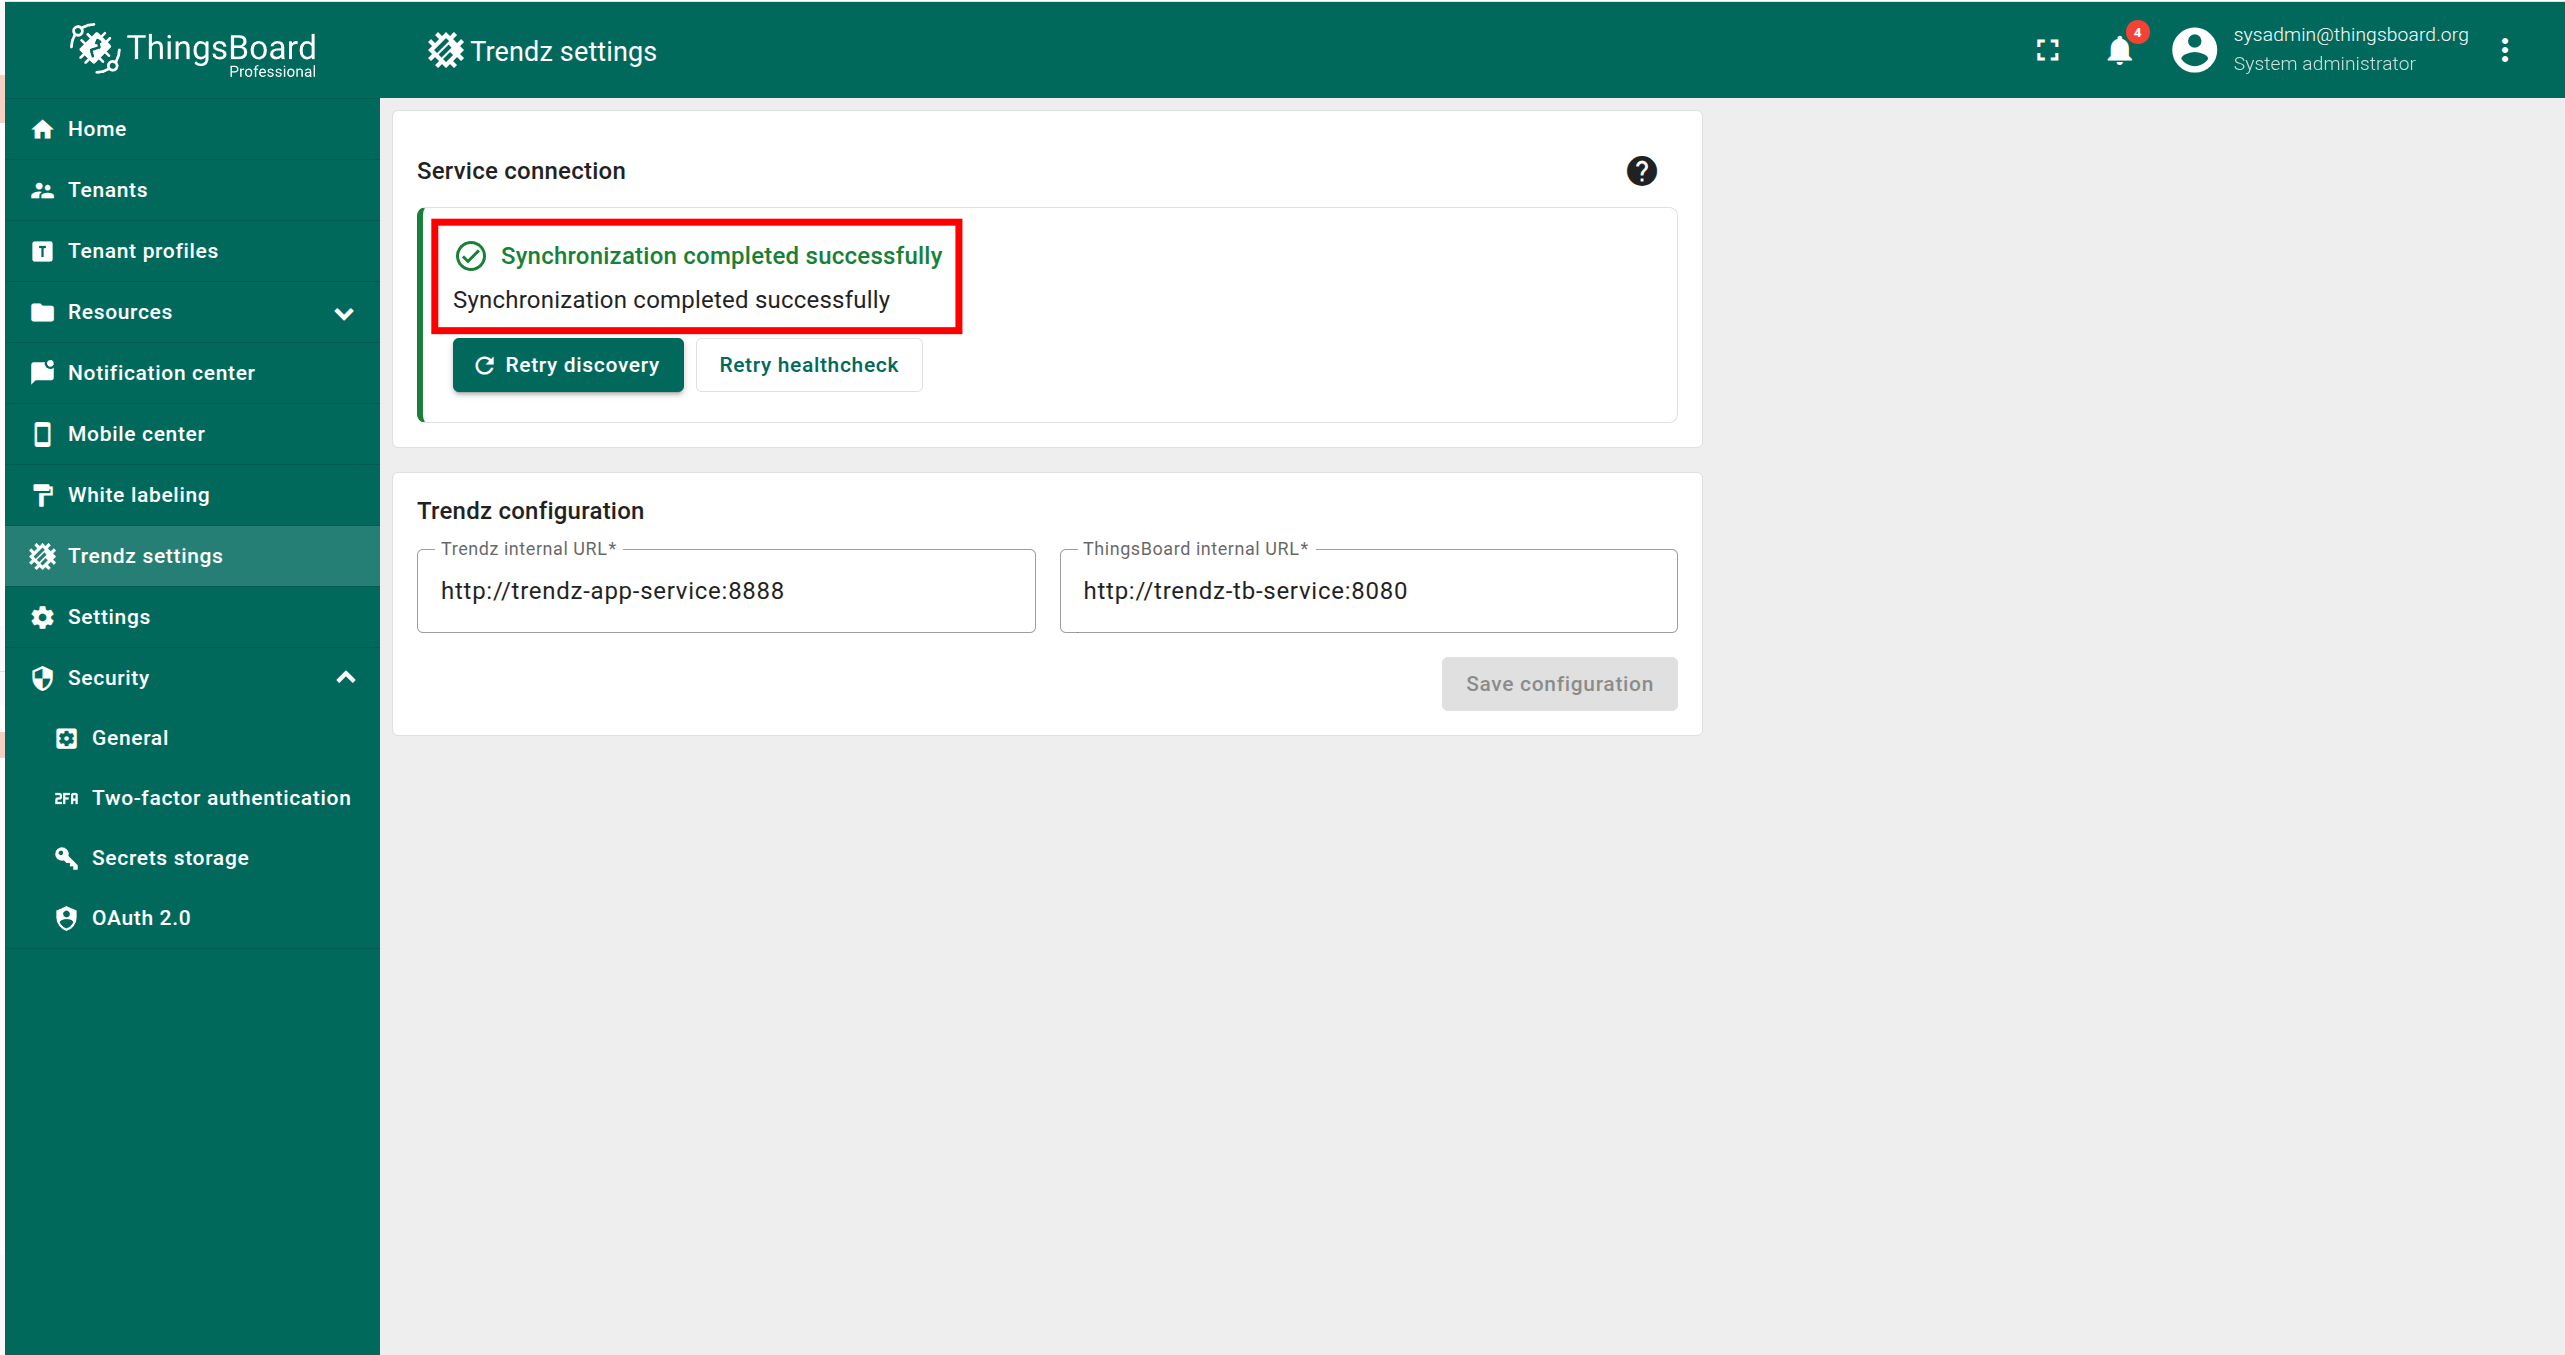
The final step is to verify that SENTIENT is synchronized with SENTIENT ANALYTICS. To do this:
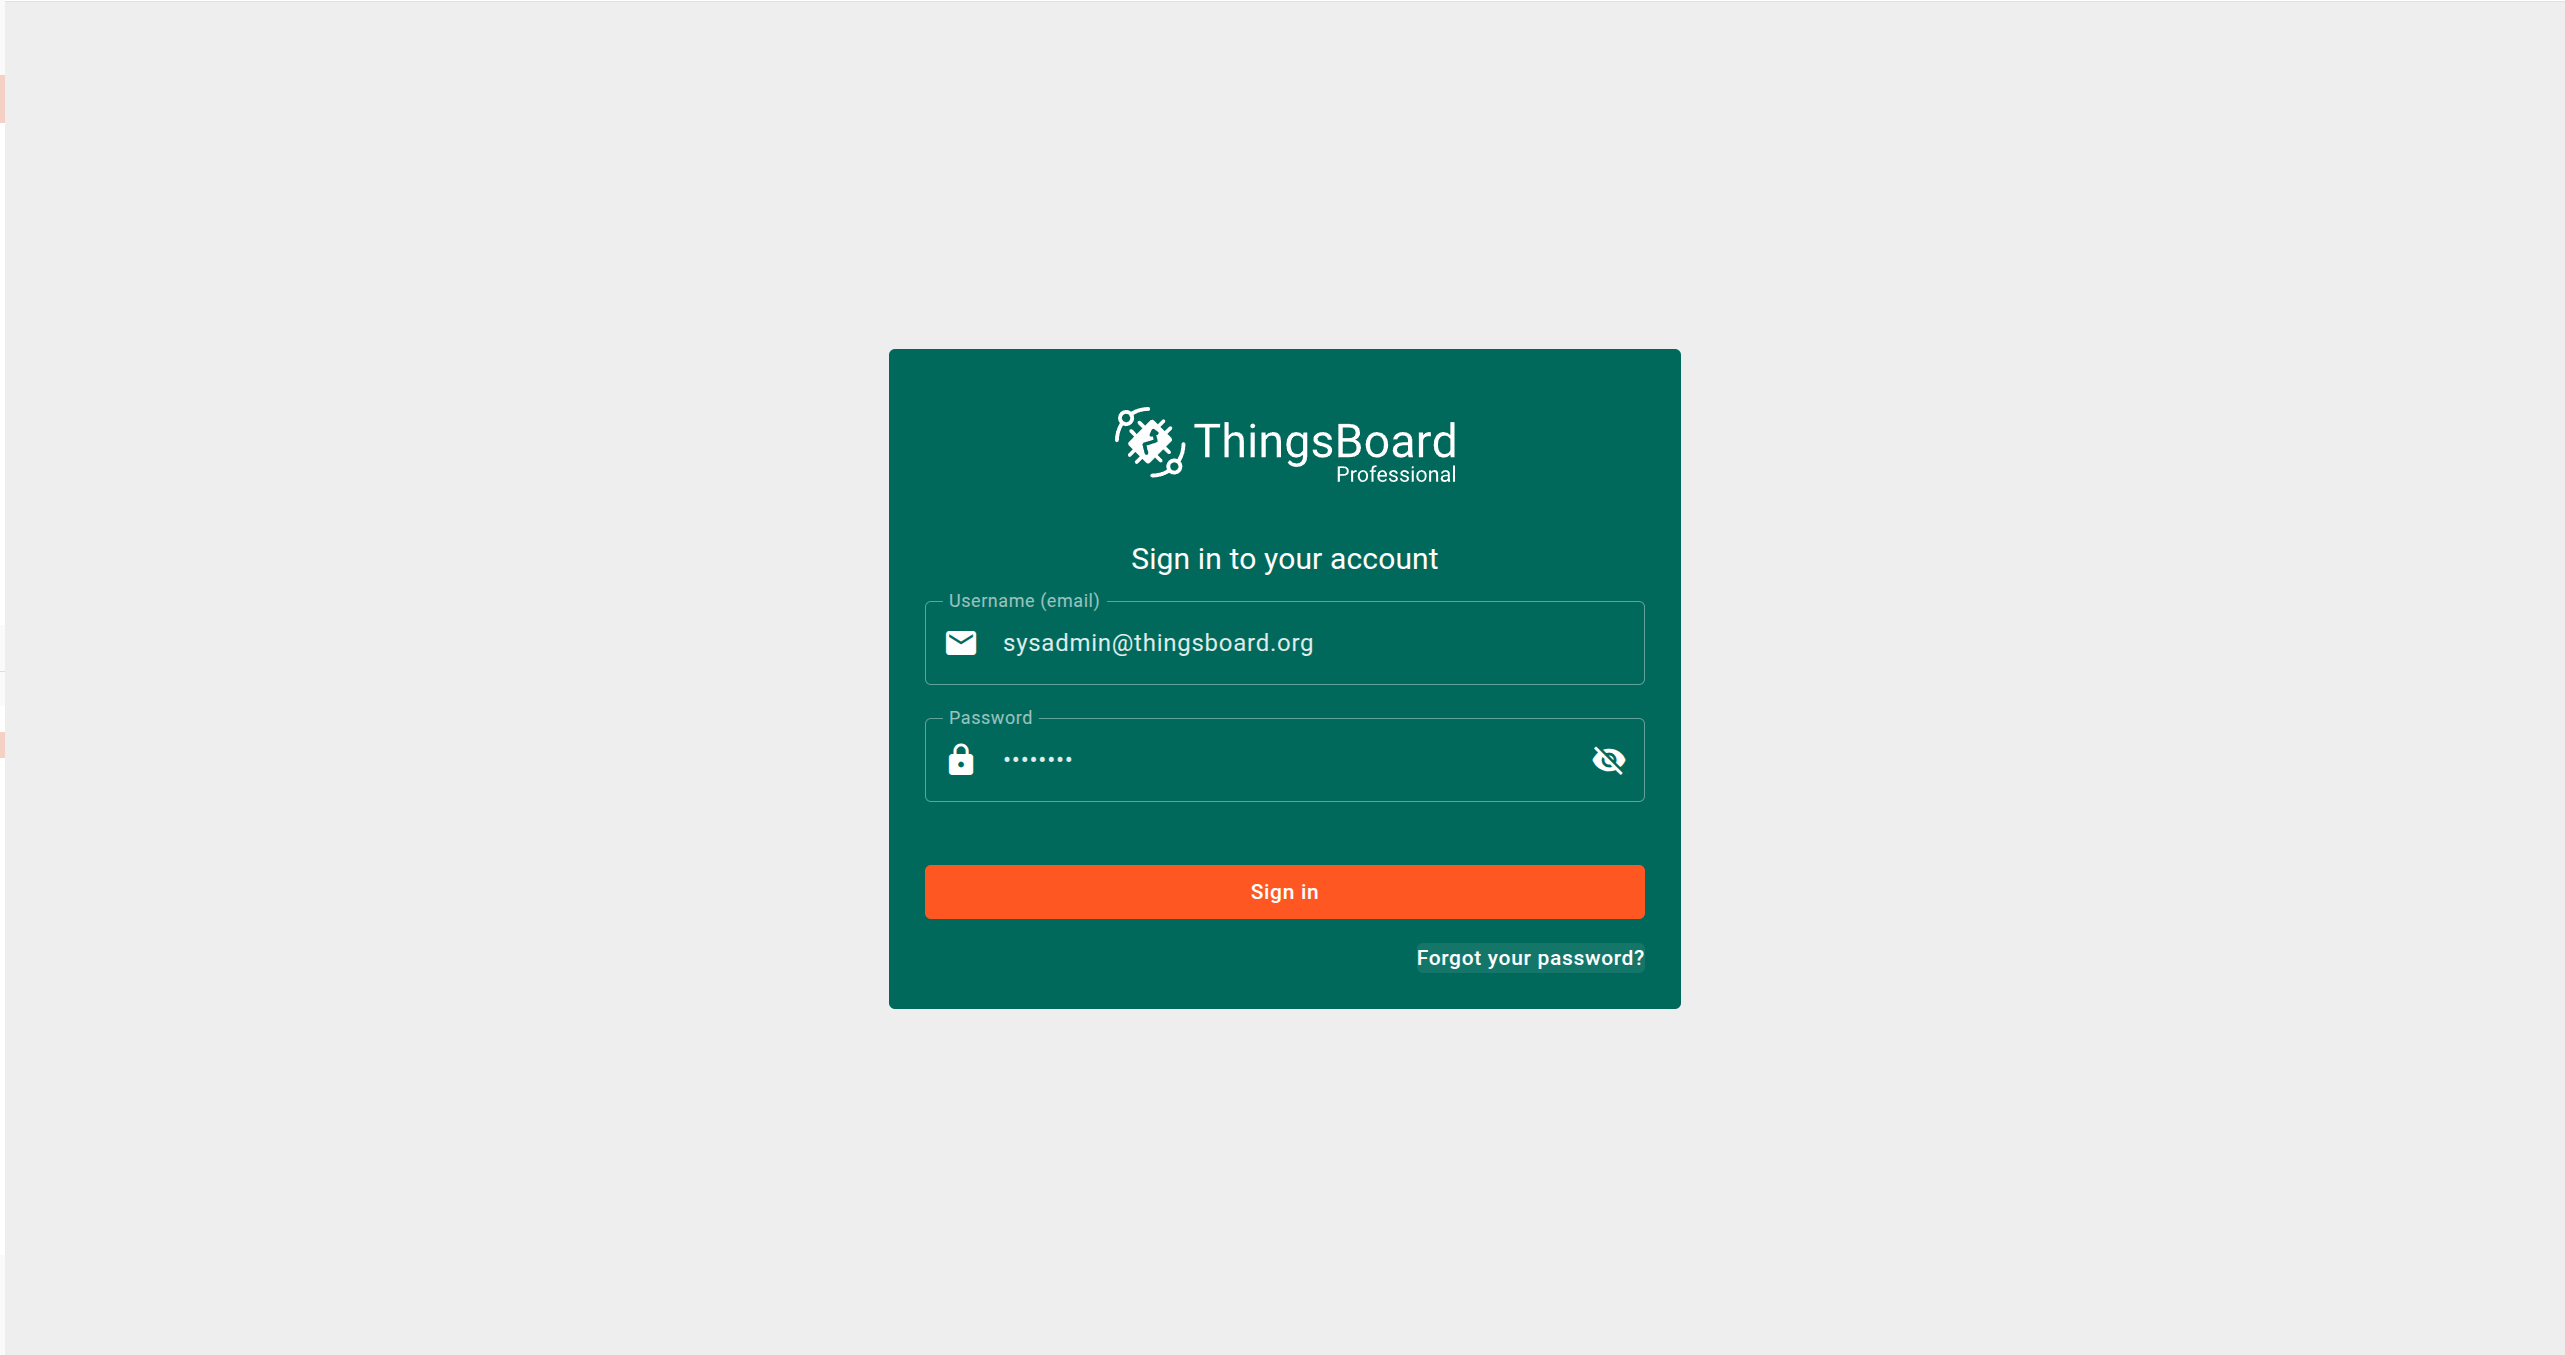
- Log in to SENTIENT as a Sysadmin.
- Open the SENTIENT ANALYTICS Settings page.
If you see the message “Synchronization completed successfully”, the synchronization has been completed automatically and no further action is required.

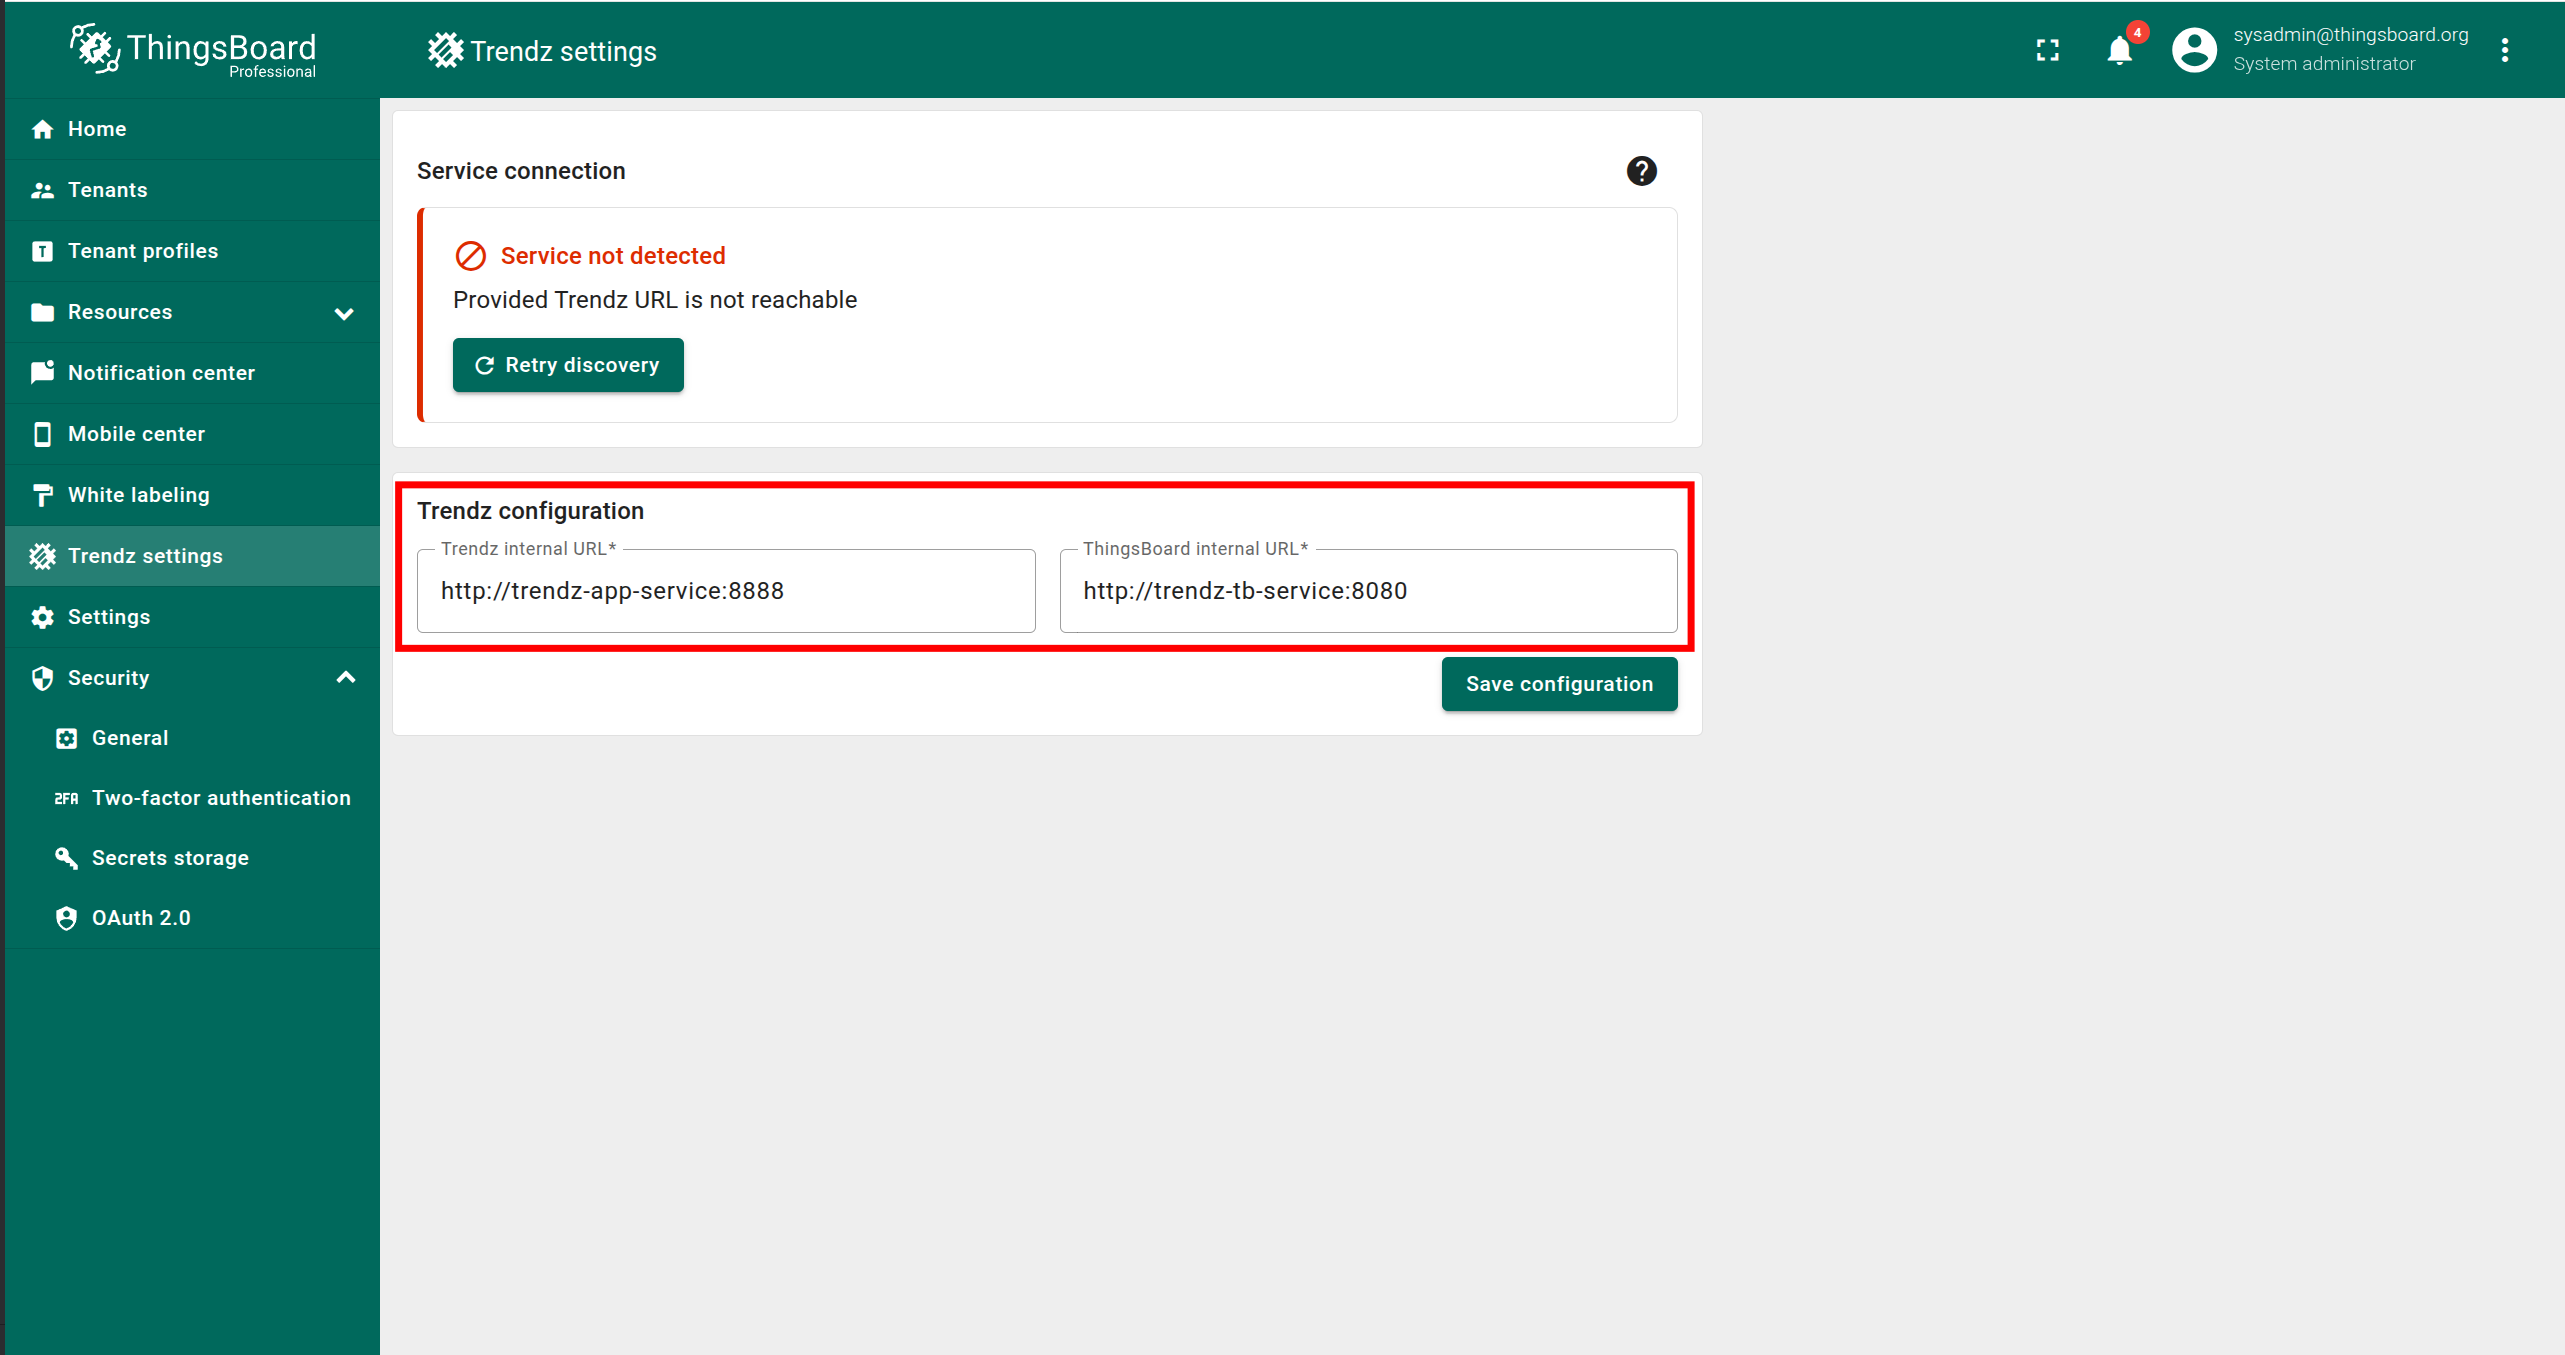
If you see an error message, follow these steps:
- Make sure that SENTIENT ANALYTICS is running.
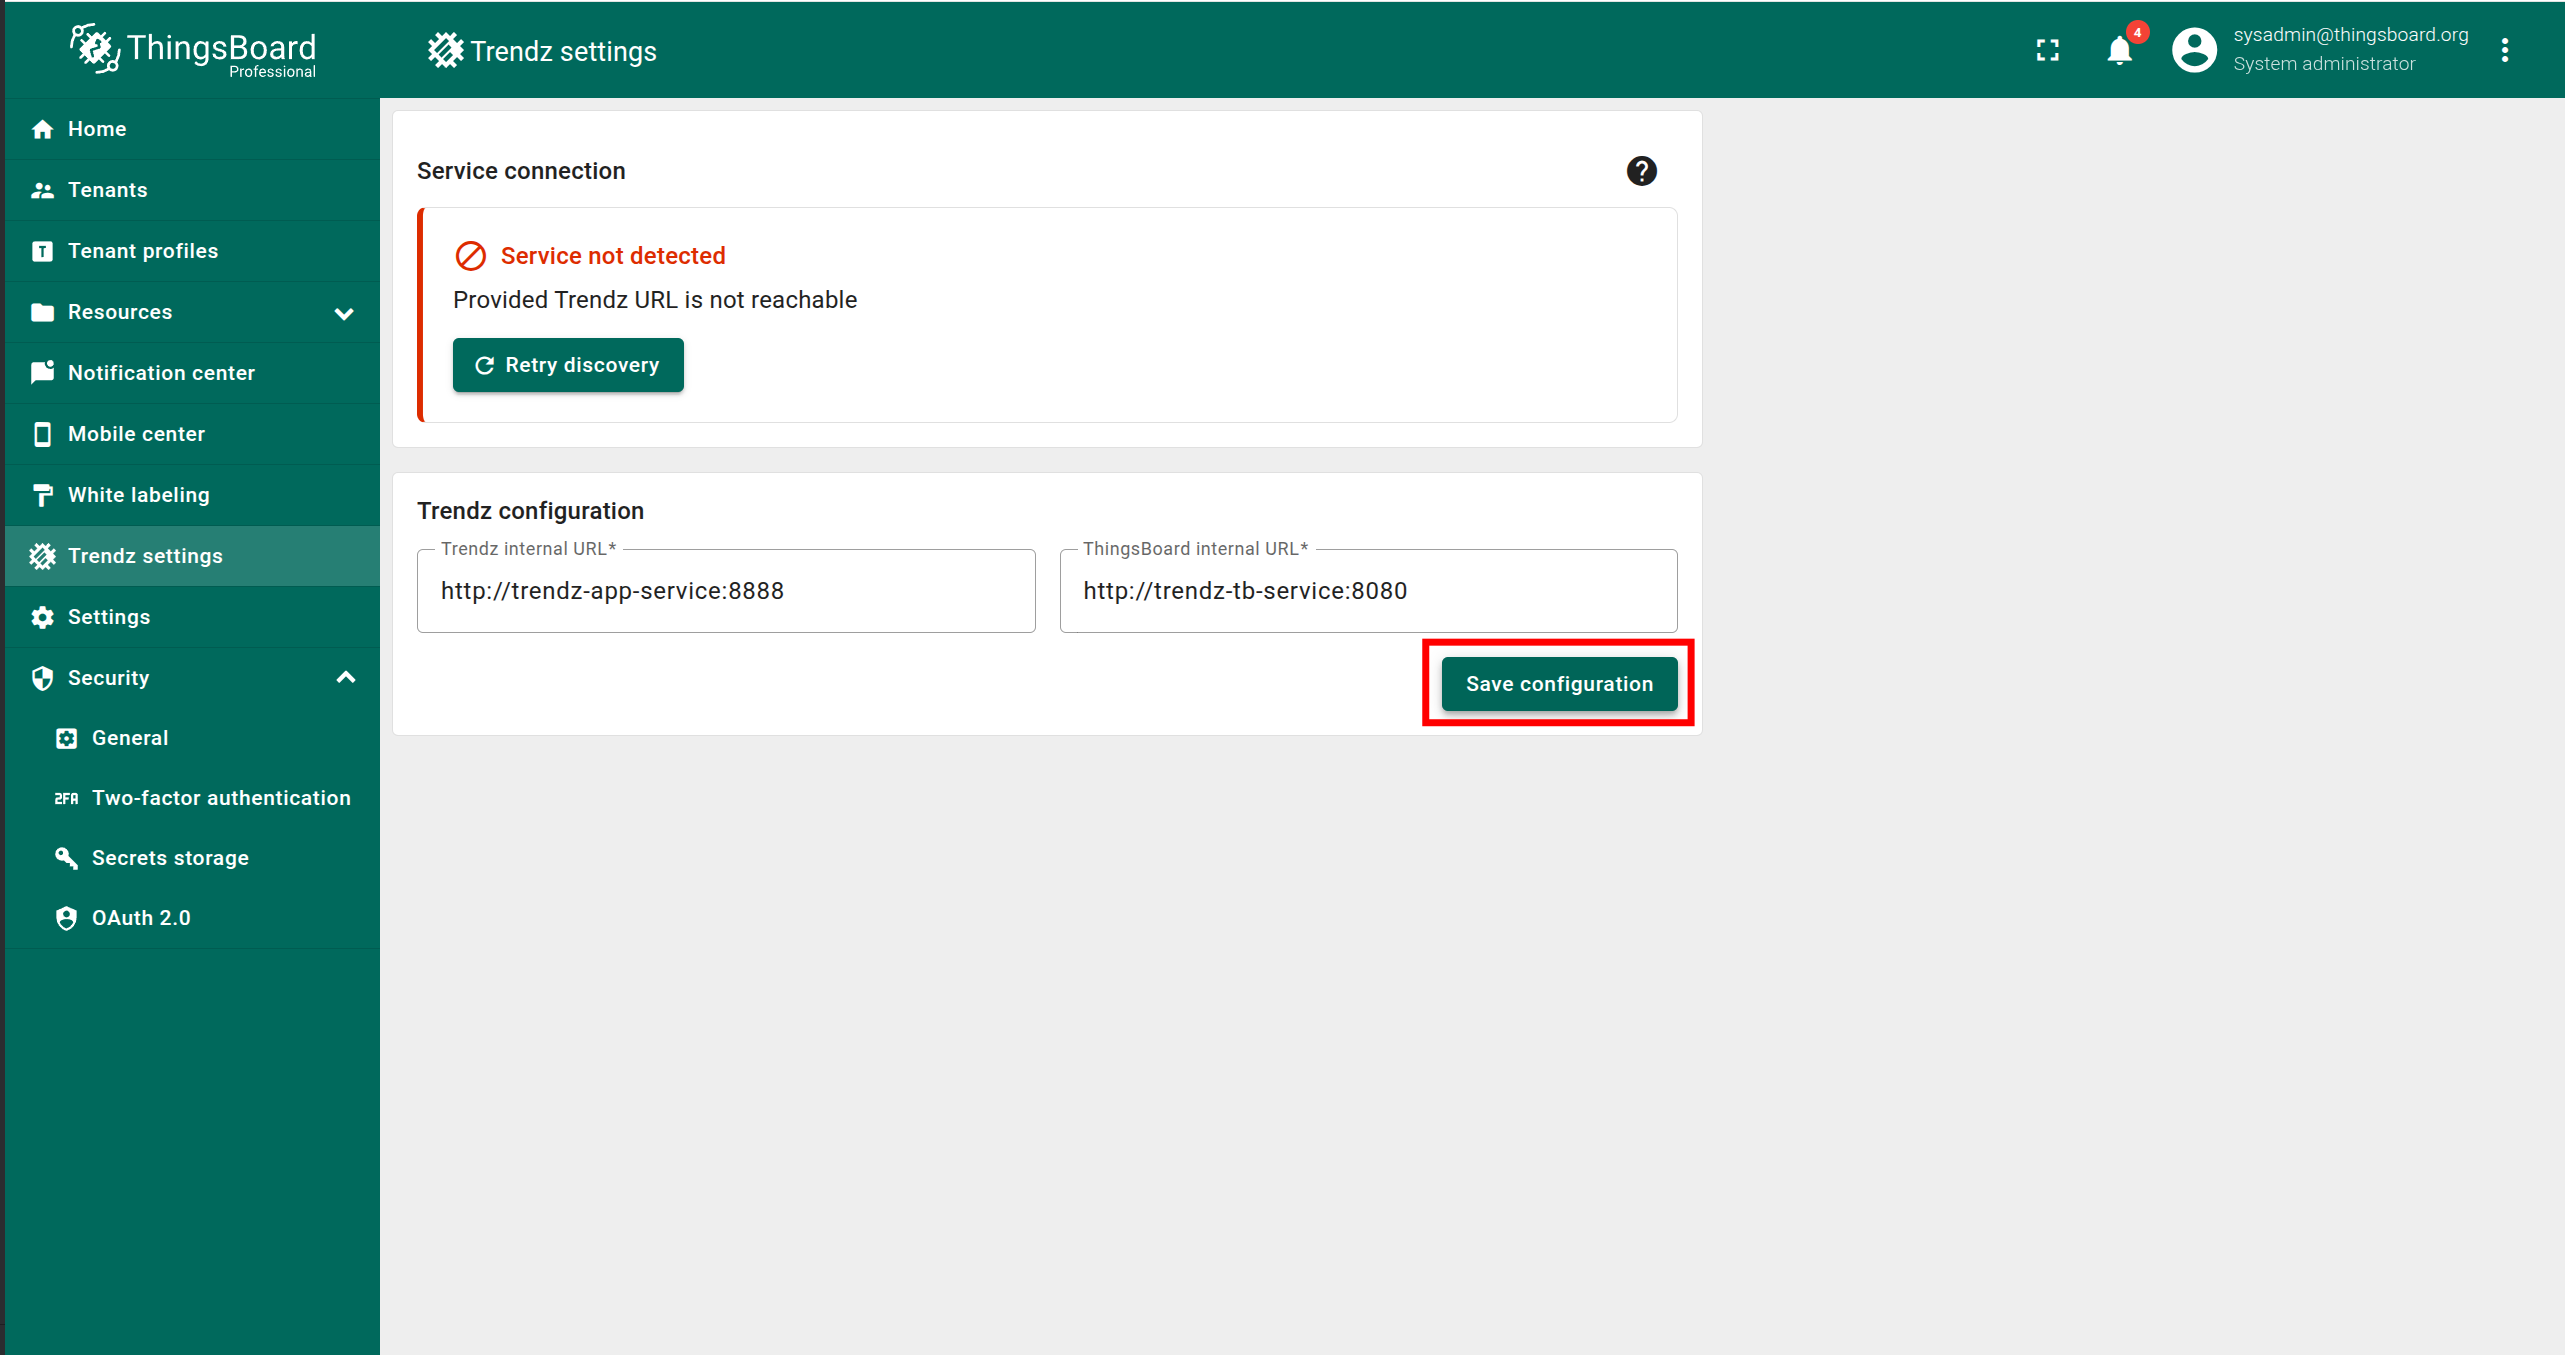
- Enter the correct SENTIENT ANALYTICS internal URL. It must be accessible from the SENTIENT service.
- Enter the correct SENTIENT internal URL. It must be accessible from the SENTIENT ANALYTICS service.
- Click Save configuration.
- Click Retry discovery.
Once the message “Synchronization completed successfully” appears, the synchronization is complete.


Authentication
You can access SENTIENT ANALYTICS UI by default at http://localhost:8888
SENTIENT ANALYTICS uses SENTIENT as an authentication service, so for first authentication, you need to use Tenant Administrator credentials from your SENTIENT.
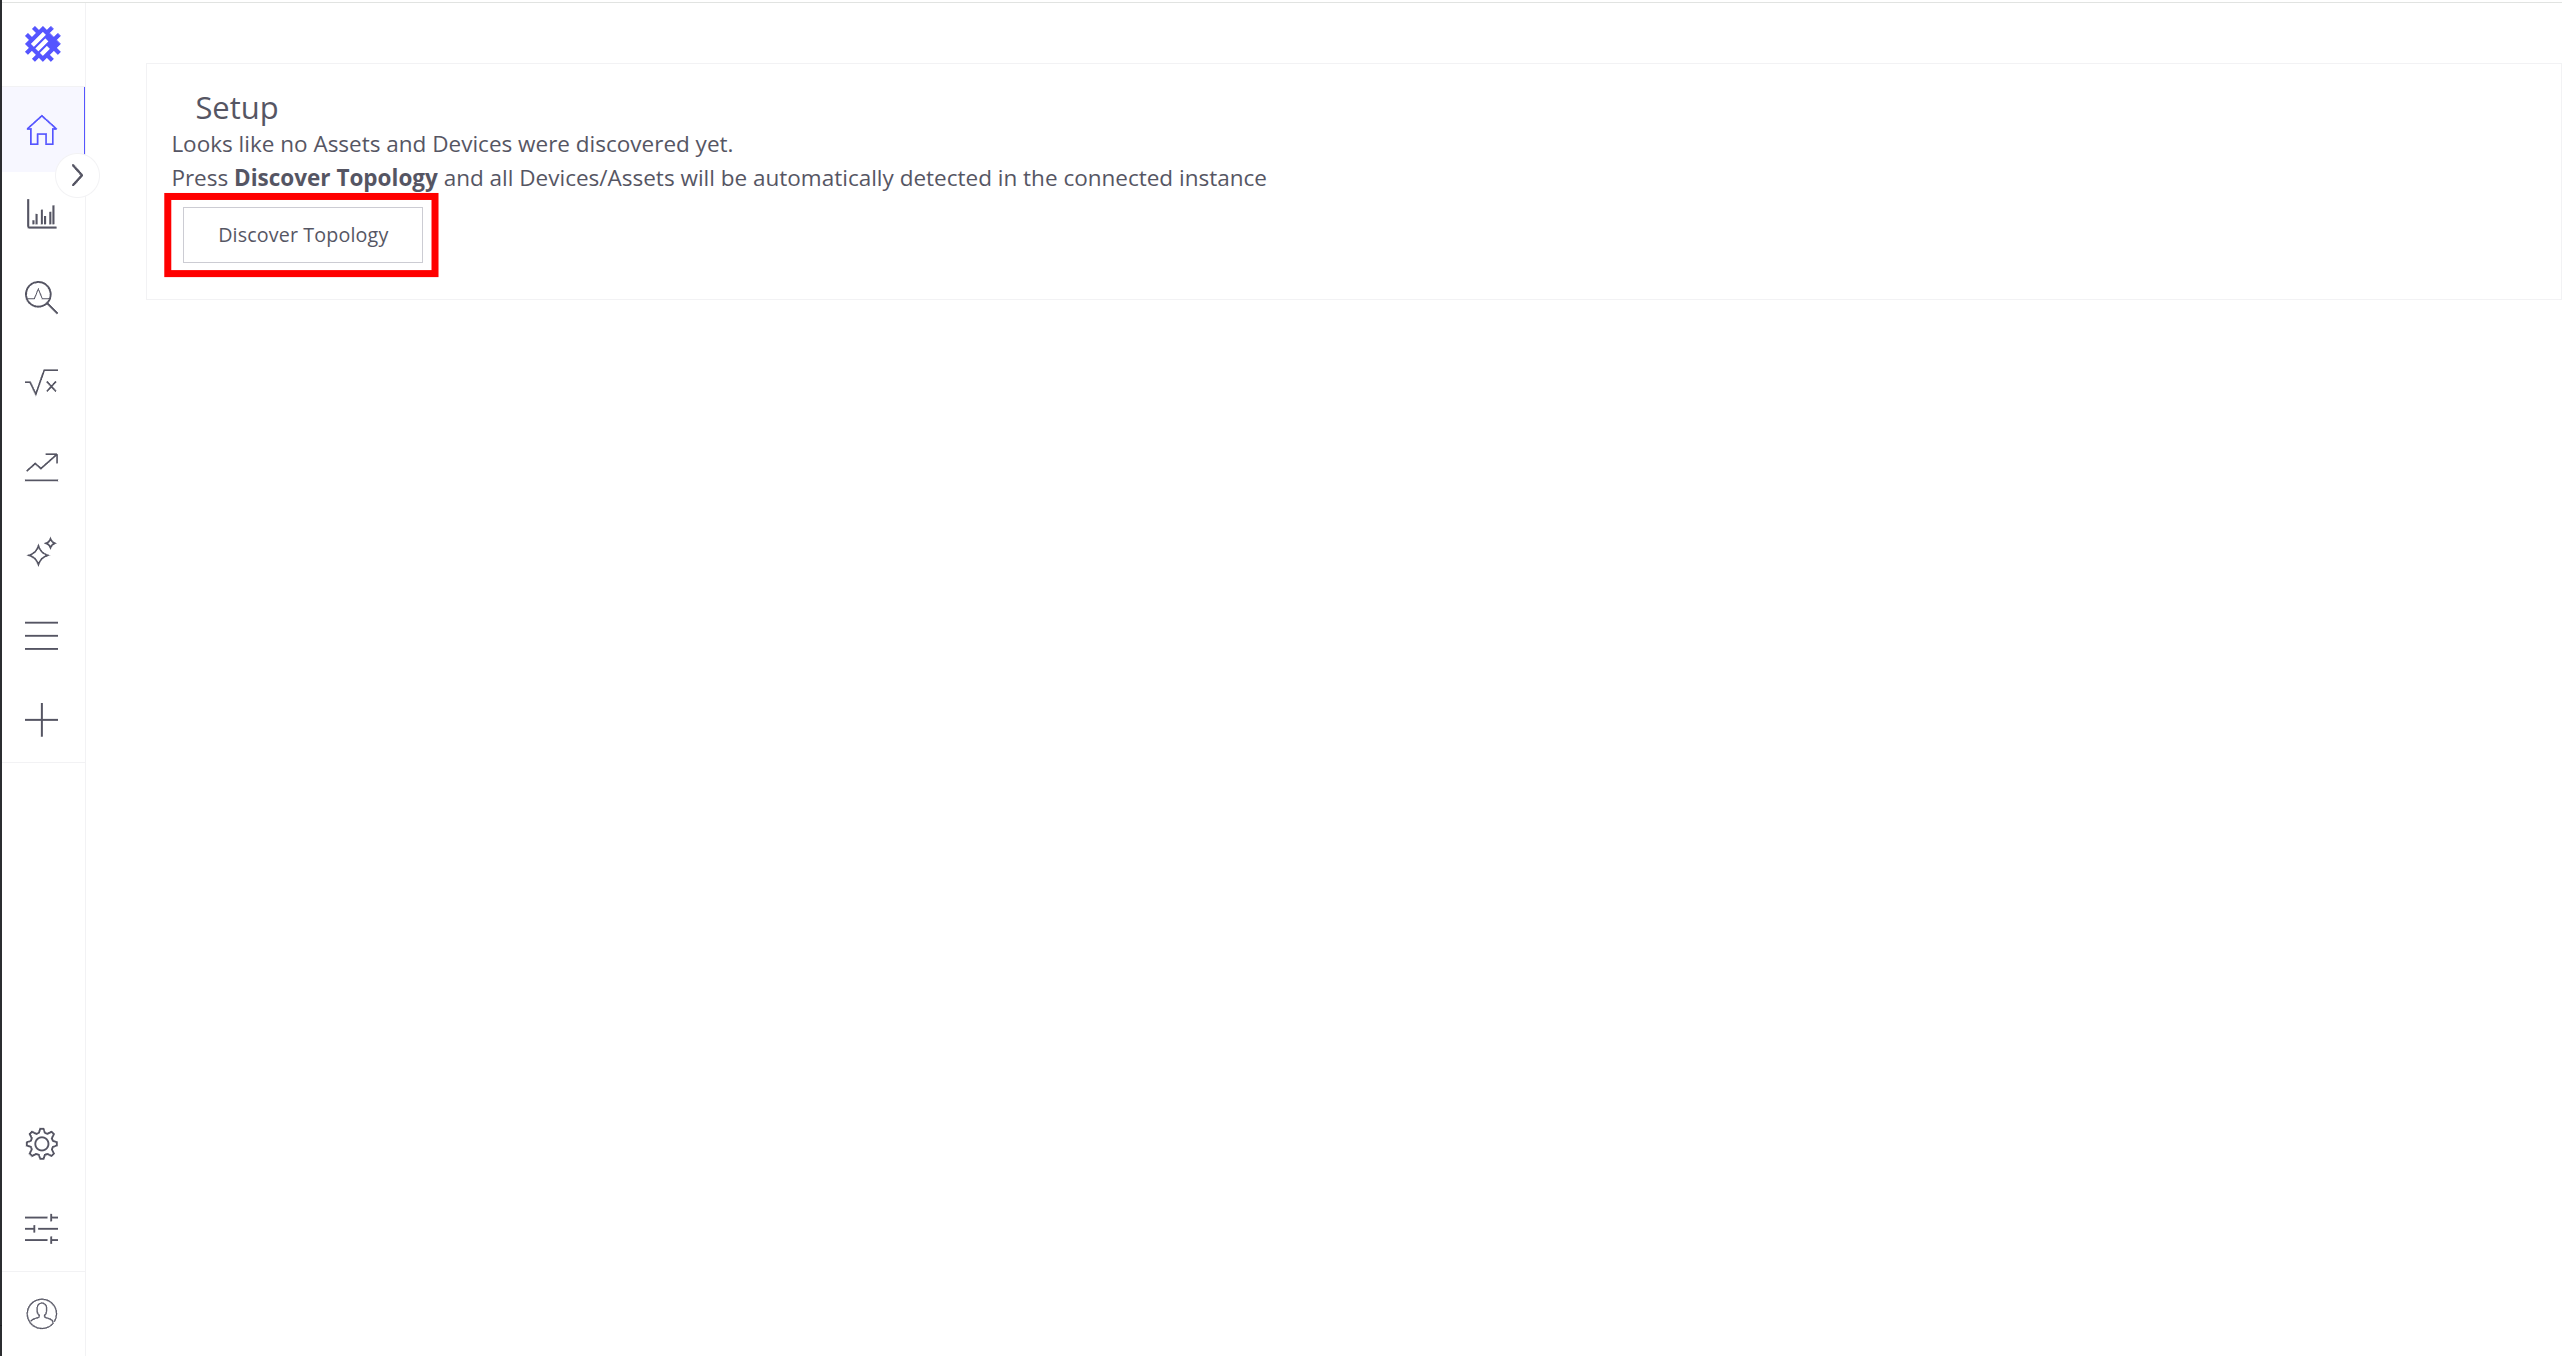
Topology Discovery
After the first login to SENTIENT ANALYTICS, you need to discover topology to allow SENTIENT ANALYTICS to know about assets, devices, their profiles and relations:
- Click the Discover Topology button to start topology discovery process.
- Wait until your topology will be discovered.
- Click the Finish button to close topology discovery page and unlock the main SENTIENT ANALYTICS functionality.
Click the Discover Topology button to start topology discovery process.
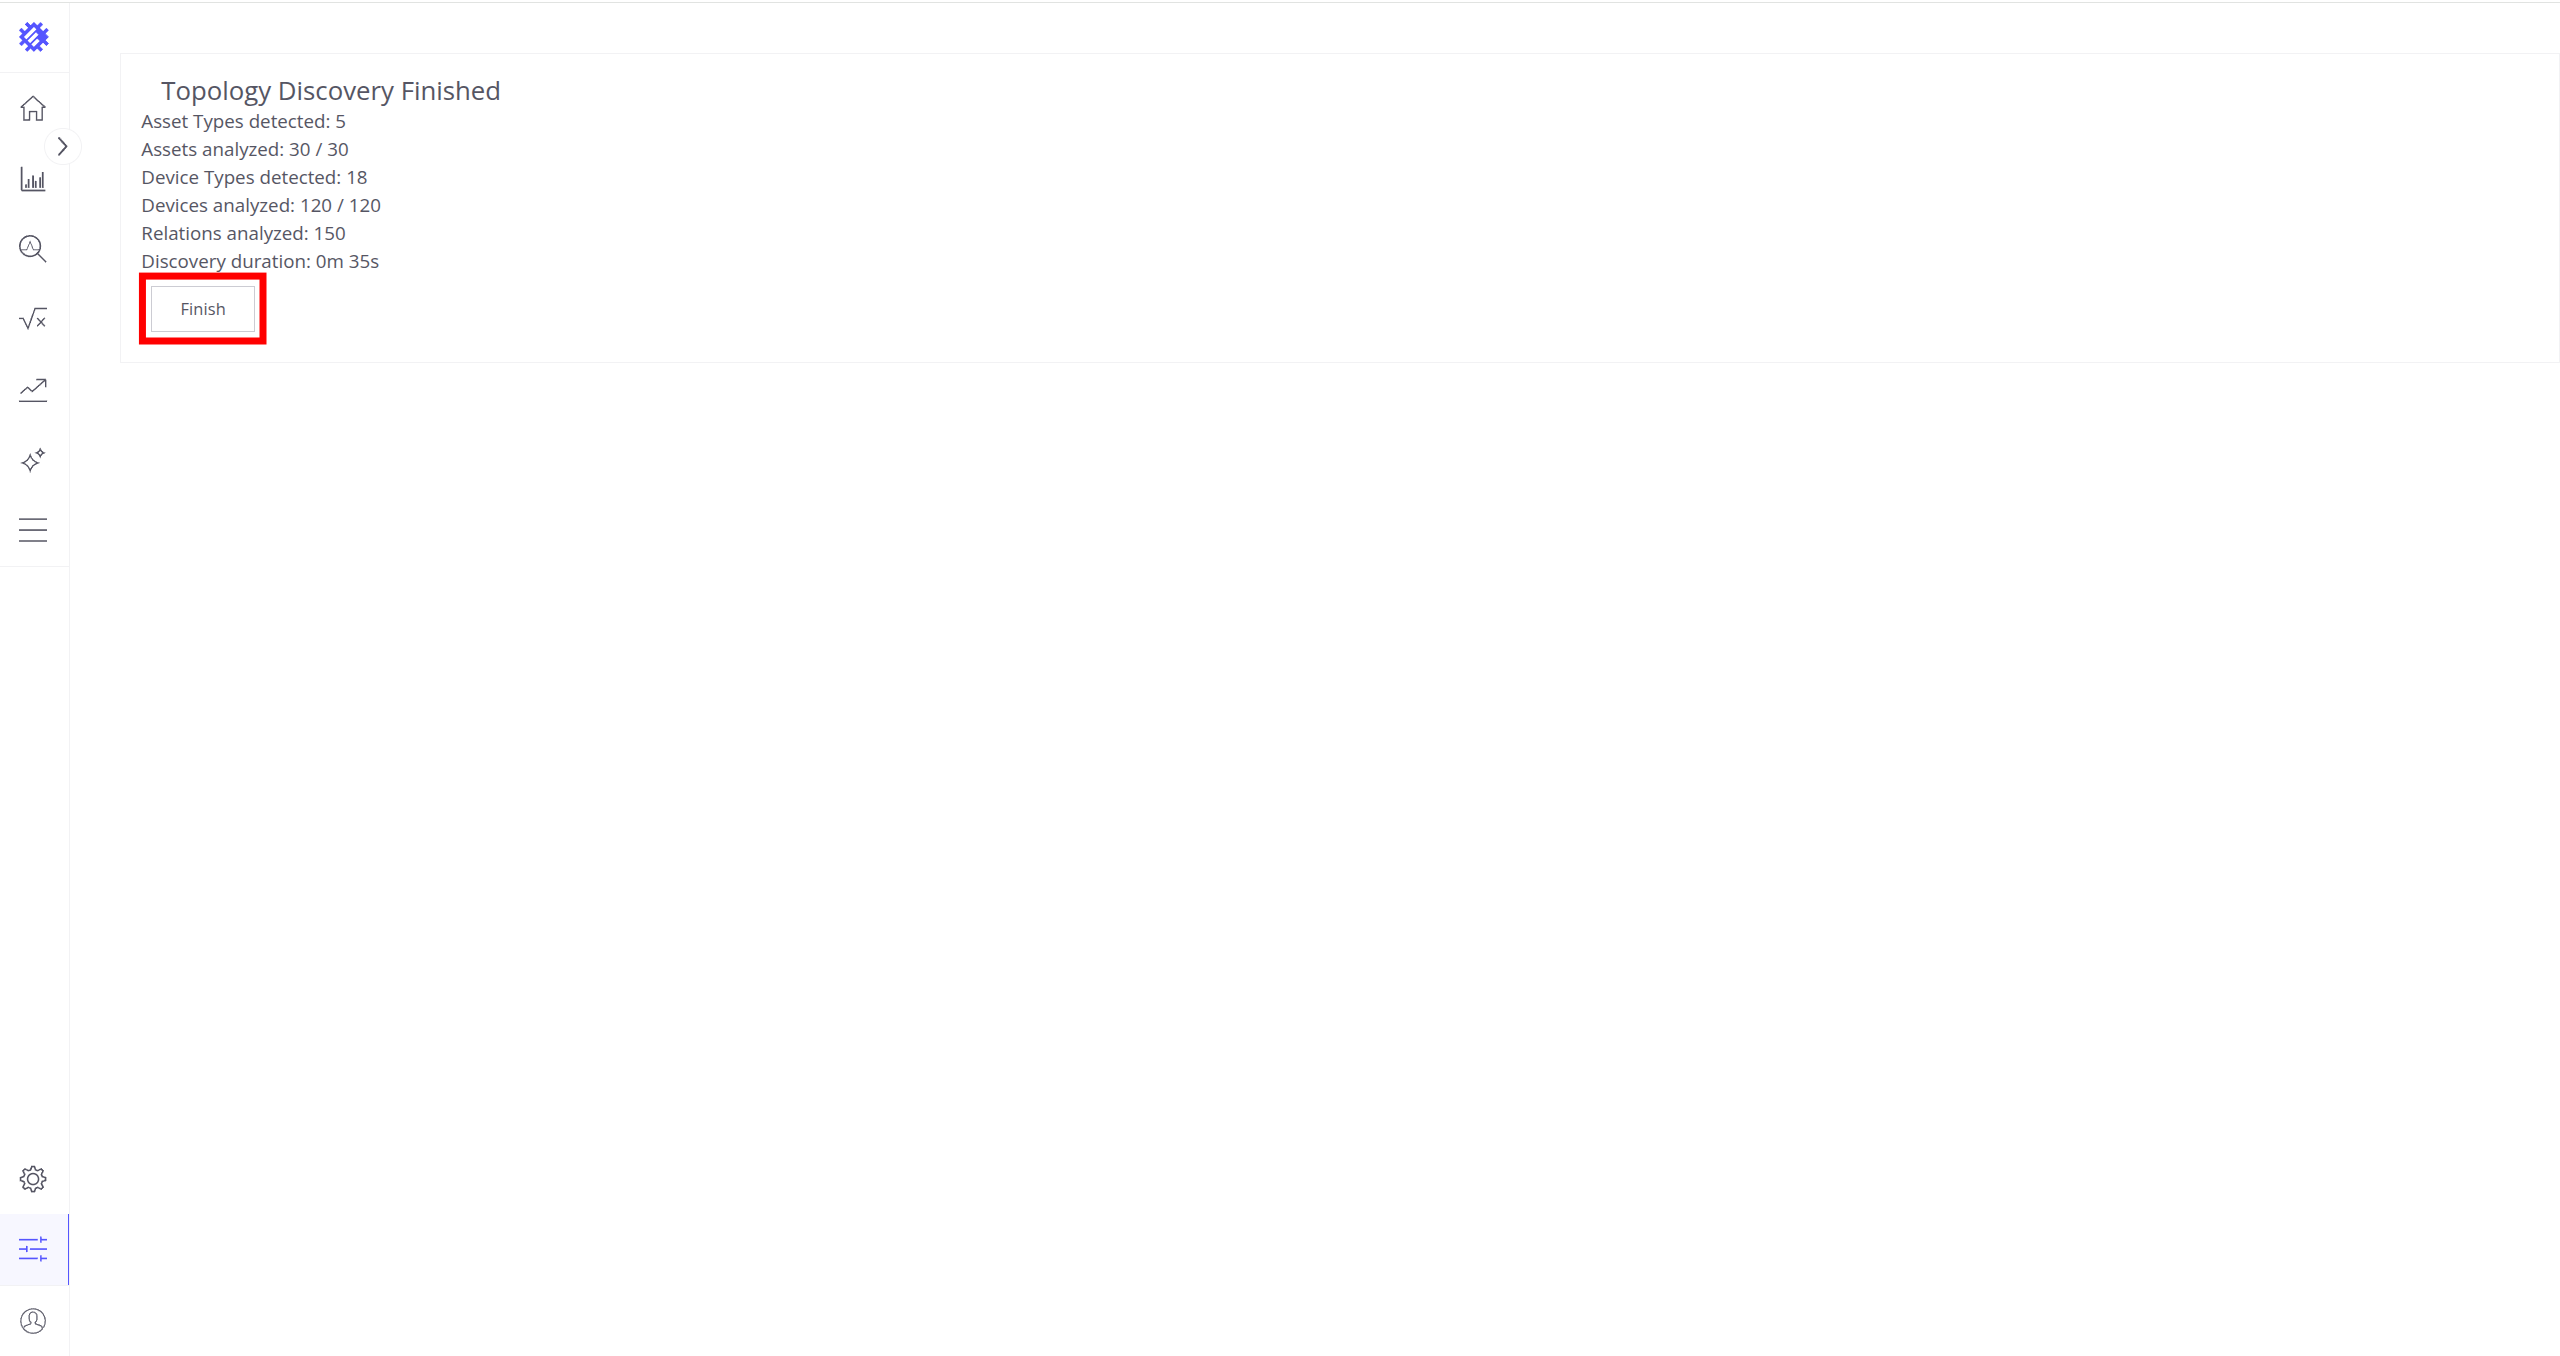
Click the Finish button to close topology discovery page and unlock the main SENTIENT ANALYTICS functionality.
You could read more about how SENTIENT ANALYTICS uses this topology here.
Detaching, stop and start commands
You can detach from session terminal using Ctrl-p Ctrl-q key sequence - the container will keep running in the background.
In case of any issues, you can examine service logs for errors. For example, to see SENTIENT ANALYTICS container logs, execute the following command:
1
docker compose logs -f sentient-analytics
To stop the container:
1
docker compose stop sentient-analytics
To start the container:
1
docker compose start sentient-analytics
Upgrade SENTIENT ANALYTICS Service
Note, that you can upgrade SENTIENT ANALYTICS from any version to the latest at once (for example, 1.2.0 -> 1.15.0.4 ,etc).
Below is an example of how to upgrade from any SENTIENT ANALYTICS version to 1.15.0.4
- Create a dump of your database:
1
docker compose exec sentient-analytics-postgres sh -c "pg_dump -U postgres sentient-analytics > /var/lib/postgresql/data/sentient-analytics_dump"
When a new SENTIENT ANALYTICS release is available, follow these steps to update your installation without losing data:
If you are upgrading using previous version of deployment files, make sure to follow steps described in this instruction first.
-
Change the version of the
sentient/sentient-analyticsandsentient/sentient-analytics-python-executorin thedocker-compose.ymlfile to the 1.15.0.4. -
Execute the following commands:
1
2
3
4
docker pull sentient/sentient-analytics:1.15.0.4
docker compose stop sentient-analytics
docker compose run --rm -e UPGRADE_SENTIENT_ANALYTICS=true sentient-analytics
docker compose up -d
Troubleshooting
DNS issues
NOTE If you observe errors related to DNS issues, for example
1
127.0.1.1:53: cannot unmarshal DNS message
You may configure your system to use Google public DNS servers
Next steps
-
Getting started guide - These guide provide quick overview of main SENTIENT ANALYTICS features.
-
Metric Explorer - Learn how to explore and create new metrics with SENTIENT ANALYTICS Metric Explorer.
-
Anomaly Detection - Learn how to identify anomalies in the data.
-
Calculated Fields - Learn about Calculated fields and how to use them.
-
States - Learn how to define and analyse states for assets based on raw telemetry.
-
Prediction - Learn how to make forecasts and predict telemetry behavior.
-
Filters - Learn how filter dataset during analysis.
-
Available Visualizations - Learn about visualization widgets available in SENTIENT ANALYTICS and how to configure them.
-
Share and embed Visualizations - Learn how to add SENTIENT ANALYTICS visualizations on SENTIENT dashboard or 3rd party web pages.
-
AI Assistant - Learn how to utilize SENTIENT ANALYTICS AI capabilities.